Installation Guide Salesforce Cartridge
Import Cartridge
Import int_katapult_SFRA into your Workspace inside the cartridges folder
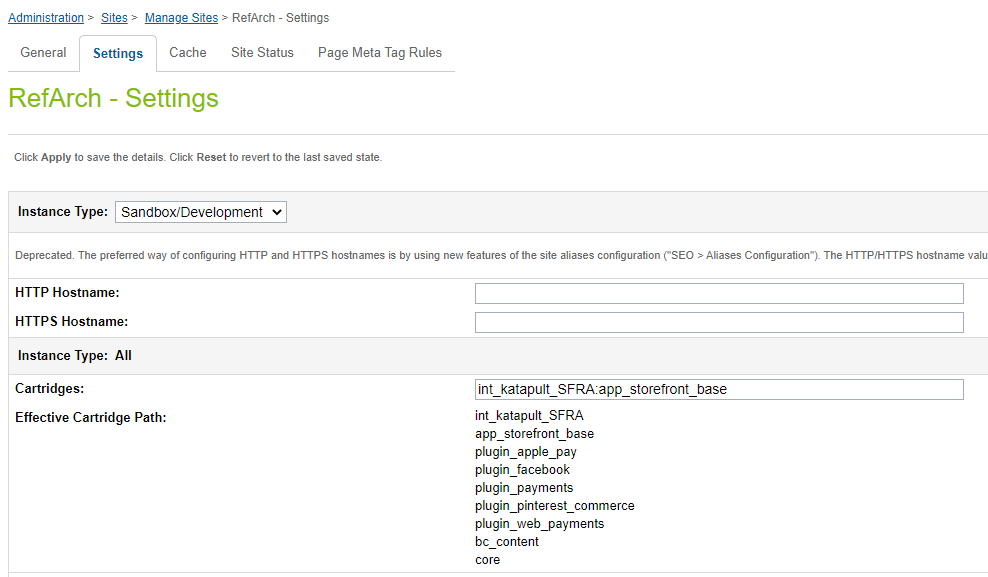
Modify the Site Path in Business Manager > Administration > Manage Sites > 'Your Site' > Settings
Make sure the cartridge name int_katapult_SFRA appear before any other cartridges

If using Visual Studio code, use the below dw.json format to upload the cartridges to the sandbox. Place it at the root of the working directory.
{
  "hostname": "your-sandbox-hostname.demandware.net",
  "username": "your_user",
  "password": "your_password",
  "code-version": "version_to_upload"
}
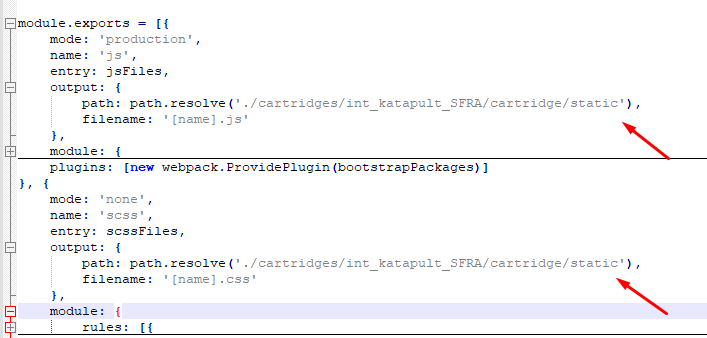
Set the Cartridge to Compile Front-End
Make sure that the cartridge it's a part of the compilator inside of the webpack.config.js

Compile Front-End
Run the command npm run compile:js to compile front-end scripts.
Run the command npm run compile:scss to compile front-end styles.
Import Metadata
Locate folder katapult_site_import inside metadata folder, change site name if needed inside sites folder and compress the katapult_site_import folder to katapult_site_import.zip
Log in to the Business Manager
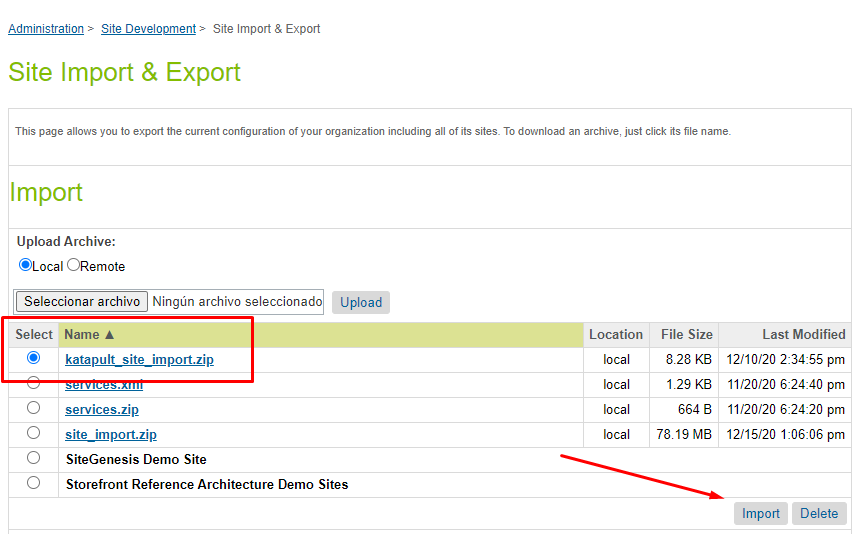
Click Administration > Site Development > Site Import & Export
Use the upload control to browse the katapult_site_import.zip file located in the metadata folder
Click Upload
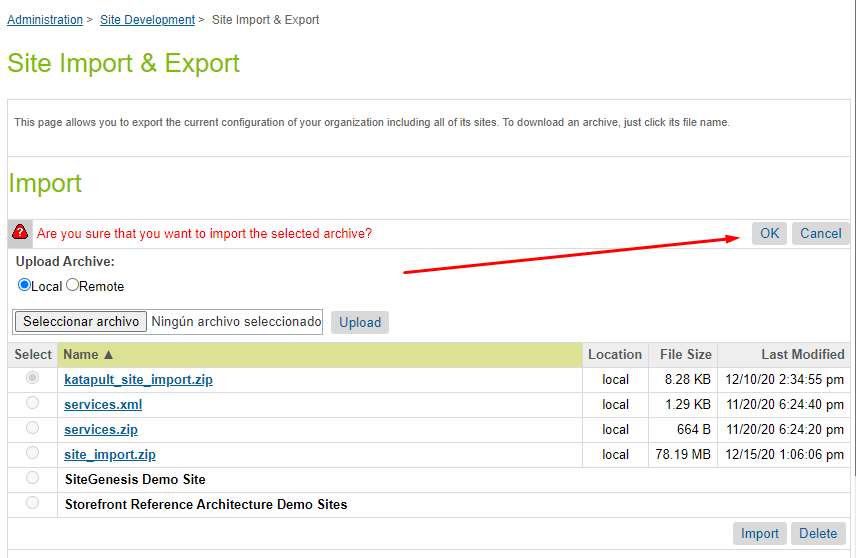
Select the katapult_site_import.zip and click Import, press OK on the confirmation alert.
Import should complete successfully


Updated over 4 years ago
