
Price Calculator Widget
as low as product pricing
Getting Started
The Katapult JavaScript Plugin enables integration with the Katapult platform without direct API integration.
Follow the steps below to get started with the Price Calculator widget.
Step 1
You can skip this step if you already have implemented the HTML script on your page from the widget page.
Place the following script tag on the bottom of your page. This snippet uses an asynchronous loading method that allows you to immediately use the katapult.js plugin without a significant impact on the load time of your page. It will also append stylesheet file.
Environment Reminder
Remember, your public token varies depending on whether you’re testing with the Katapult sandbox or your project is live in production. The token you use here must match the environment you define.
Development: https://sandbox.katapult.com
Production: https://www.katapult.com
<script>
    var _katapult_config = {
        api_key: "INSERT YOUR PUBLIC TOKEN HERE",
        environment: "https://sandbox.katapult.com"
    };

    !function(e,t){e.katapult=e.katapult||{};var n,i,r;i=!1,n=document.createElement("script"),n.type="text/javascript",n.async=!0,n.src=t.environment+"/"+"plugin/js/katapult.js",n.onload=n.onreadystatechange=function(){i||this.readyState&&"complete"!=this.readyState||(i=!0,e.katapult.setConfig(t.api_key))},r=document.getElementsByTagName("script")[0],r.parentNode.insertBefore(n,r);var s=document.createElement("link");s.setAttribute("rel","stylesheet"),s.setAttribute("type","text/css"),s.setAttribute("href",t.environment+"/"+"plugin/css/katapult.css");var a=document.querySelector("head");a.insertBefore(s,a.firstChild)}(window,_katapult_config);
</script>
Step 2
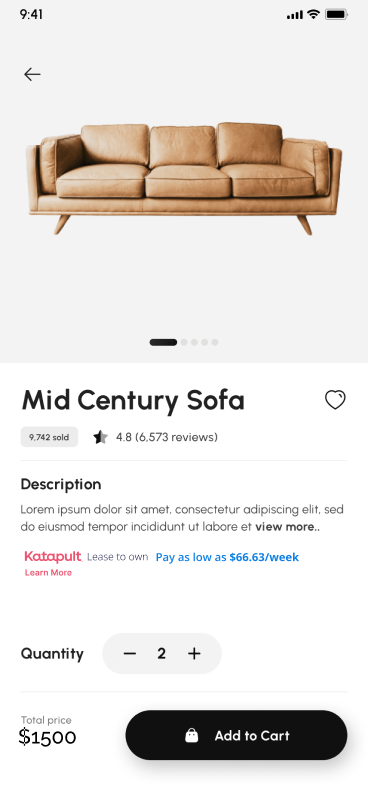
Place a button on the pages where you want the Katapult Price Calculator functionality to be available. Clicking on the price or ‘Lean more’ will load the Katapult Price Calculator form.
Important
You must add price to
data-katapult-item-priceattribute
<div class="katapult-price-calculator">
<div class="katapult-flex">
<div class="katapult-price-calculator-logo"></div>
<span class="katapult-price-calculator-lease">Lease to own</span>
<span class="katapult-price-calculator-pay" data-katapult-item-price="">Pay as low as</span>
<a href="#" class="katapult-price-calculator-price btn-katapult-price-calculator" data-katapult-item-price="">$/week</a>
</div>
<div><a href="#" class="katapult-price-calculator-pre-approve btn-katapult-price-calculator">Get Pre-approved</a></div>
</div>
If you would like to add the price calculator to a custom button you will add the HTML
btn-katapult-price-calculatorclass.To create your own button with "as low as" pricing, you will need create a snippet that refers to the class and the data price:
Ex:
<a href="#" class="katapult-price-calculator-price" data-katapult-item-price="">$/week</a>
Step 3
To start the Price Calculator you must first initialize the calcData object with the following information:
zip code - user zip code (optional)
cash_price - item price
is_click_on_pre_approve: e?.target?.classList?.contains('katapult-price-calculator-pre-approve')
Place this script under the button
<script>
  // you may need to add katapult.estimatePrice(); here for the price to reflect on the product page
  document.querySelectorAll('.btn-katapult-price-calculator').forEach((item) => {
    item.addEventListener('click', function(e) {
      e.preventDefault()
      var calcData = {
        zip_code: zip code, (optional)
        cash_price: price,
        is_click_on_pre_approve: e?.target?.classList?.contains('katapult-price-calculator-pre-approve')
      }
      katapult.loadPriceCalculator(calcData);
    })
  })
</script>
Variable Price Calculator
Step 1
Add Price Calculator markup
<div class="katapult-price-calculator">
<div class="katapult-flex">
<div class="katapult-price-calculator-logo"></div>
<span class="katapult-price-calculator-lease">Lease to own</span>
<span class="katapult-price-calculator-pay" data-katapult-item-price="">Pay as low as</span>
<a href="#" class="katapult-price-calculator-price btn-katapult-price-calculator" data-katapult-item-price="">$/week</a>
</div>
<div><a href="#" class="katapult-price-calculator-pre-approve btn-katapult-price-calculator">Get Pre-approved</a></div>
</div>
Step 2
Add 3 sizes on the product page
Small, Medium, Large, and increase the price by size.
For example:
- Small - $500
- Medium - $750
- Large - $1000
Step 3
Add basic Price Calculator JS code
<script>
// you may need to add katapult.estimatePrice(); here for the price to reflect on the product page

document.querySelectorAll('.btn-katapult-price-calculator').forEach((item) => {   item.addEventListener('click', function(e) { e.preventDefault() var calcData = { zip_code: zip code, (optional) cash_price: price, is_click_on_pre_approve: e?.target?.classList?.contains('katapult-price-calculator-pre-approve') } katapult.loadPriceCalculator(calcData); }) })

</script>
Step 4
Add Observer code to observe changes of size:
katapult.updateAsLowAsValueInPriceCalculator = function(newPrice) {
        var element = document.querySelector(".katapult-price-calculator-price");
        element.setAttribute('data-katapult-item-price', newPrice);
        katapult.estimatePrice();
    };

function  createMutationObserverFor(target, callback) {
	if(target){
		const observer = new MutationObserver(callback.bind(this));
		observer.observe(target, {attributes: true, childList: true, subtree: true});
		return observer;
	}
}
let target = document.querySelector('#productPrice');
createMutationObserverFor(target,priceChange);
function priceChange(){
	console.log("u r here >>  ")
	let priceValue = document.querySelector('#productPrice .sales .value').getAttribute('content');
	console.log('priceValue ',priceValue)
	if(priceValue){
	  katapult.updateAsLowAsValueInPriceCalculator(priceValue);
	}
}
Please pay attention to lines 14 and 18 of above code. The id of target and price value selector should be updated accordingly to store
Done.
Updated about 1 month ago